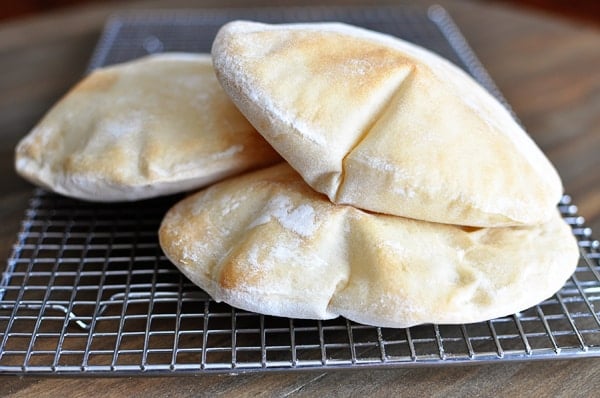
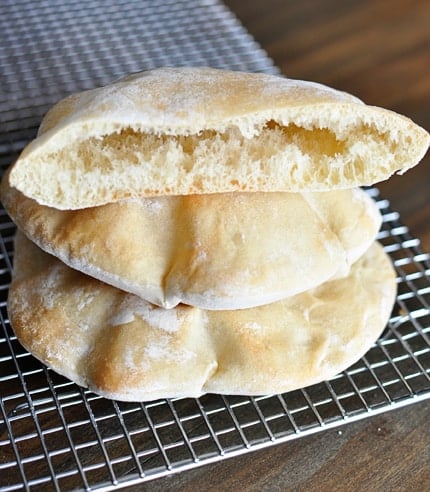
I think the puffing aspect of pita bread is what scares the bejeebies out of most people who think they might, at some point in their life, want to try making pita bread on their own at home. Or maybe that’s just me since I’m pretty sure most normal people don’t go around obsessing about the pitfalls of pita bread. I had these epic nightmares of what would happen when all of my children had their faces pressed to the lighted oven door to watch the at-home science experiment of how pitas puff to make perfect little pockets…and I subsequently envisioned their dejected expressions when thepitas.did.not.puff. Because I was sure that would happen and that vision was definitely not going to win me mother-of-the-year award. Oh wait, that actually did happen. See? Non-puffing pitas are a serious bummer.
However, I was forced to revisit the pita bread conundrum when I came across a chicken recipe I had to try immediately (which I’ll be sharing on Friday) and which called for pita bread. I couldn’t bring myself to ruin a deliciously inviting meal with the cardboard-variety pitas I’ve spied (and yes bought) at the store on past occasions. So I took a deep breath. Embarked on some deep meditation to calm my inner angst. And I made pitas. And let me tell you, they were so wonderfully successful that I am kicking myself for not making them before. Yes, yes, there were a few that refused to puff. But thankfully there were enough that did magically puff to appease the four little grubby faces watching in amazement.
The trick with pitas, I learned after making a triple batch, is that a) they need to be rolled out as evenly as possible (overly thin or thick spots in the same pita round make for trouble when puffing) and b) the top of the pita dough needs to be a tad bit moist (no dry dough!) in order to perform the puff. Seriously, pita bread is one of the easiest yeast doughs to make. And how could you not feel superhuman when you’ve just created a piece of bread that has a pocket inside of it for goodness sakes. That alone is worth the effort to make them. A.pocket.in.bread. It’s revolutionary, I tell you.
One Year Ago: Grilled Rosemary Buttermilk Chicken
Two Years Ago: BBQ Pulled Pork Sandwiches {Slow Cooker}
Three Years Ago: Chipotle Chicken Tacos
Two Years Ago: BBQ Pulled Pork Sandwiches {Slow Cooker}
Three Years Ago: Chipotle Chicken Tacos
Note: As with all yeast doughs, I never use the flour amount called for in the recipe as a hard fast rule (unless a weight measure is given and then I pull out my kitchen scale). Because humidity, temperature, altitude and a multitude of other factors can impact how much flour you need in your yeast doughs, I always judge when to quit adding flour by the texture and look and feel of the dough rather than how much flour I’ve added compared to the recipe. This tutorial on yeast may help identify how a perfectly floured dough should be. Use the flour amount in this recipe as a guideline only. Also, I haven't tried subbing in any wheat flour (yet) so I can't guarantee results but I will update the recipe when I've tried it.
INGREDIENTS
- 1 tablespoon instant yeast
- 1 1/4 cups warm water
- 1 teaspoon salt
- 3 to 3 1/2 cups all-purpose flour
DIRECTIONS
- In the bowl of a stand mixer or in a large bowl (if mixing by hand), combine the water, yeast, salt and 1 1/2 cups flour. Beat to form a soft batter-like consistency. Add additional flour until the dough starts to come together. It may look rough and shaggy at first but as it continues kneading, it will come together. Add enough flour to form a soft dough that clears the sides of the bowl (but is still slightly tacky to the touch - see the note above) and knead for 4-5 minutes with an electric mixer or 8-9 minutes by hand until the dough is smooth and elastic.
- Turn the dough onto a lightly floured countertop and divide the dough into six equal pieces. Roll the dough pieces into a ball shape. Lightly cover the balls of dough and let them rest for 10-15 minutes. Roll each dough ball into a thin disc, about 1/4-inch thick. Do your best to keep an even thickness throughout the entire disc of dough since this helps the dough puff in the oven (among other things). Let the pita rounds rest, lightly covered, for 30-40 minutes until they are slightly puffed.
- While the pita rounds are resting, preheat the oven to 425 degrees F. There are two methods for baking the pita bread. 1) Use a baking stone. Preheat the stone in the oven for 30-40 minutes (while the pita rounds are resting). When ready to bake, gently lift a pita disc, with your fingers or a large spatula, and flip it onto the hot baking stone (if your stone is large enough you can bake more than one at a time). Flip the dough so that the side that was resting on the counter is now facing up. You want the the side that has been exposed to air (the dry side) to be down on the baking stone and the side that is more doughy and moist to be facing up - this helps the pita puff up. If you bake one or two and they aren't puffing, spritz the top of the pita round with a light mist of water before baking. 2) If you don't have a baking stone, preheat the oven like normal and then when the pitas have rested, gently flip two of them onto a large, rimmed baking sheet lined with parchment paper. Again, make sure you flip them so the side that was resting on the counter is now facing up. Spritz with water, if needed.
- Bake the pitas for 10 minutes, until they are starting to brown very lightly on top and they have puffed several inches high. Keep in mind, though, that it won't be unusual to have some pitas that just refuse to puff. Still take them out after 10 minutes - they will make great flatbreads and will still taste delicious even if they don't have the magical pocket inside. The trick to great pita puffing is to roll the pita evenly and to make sure the dough isn't dry on top when it goes in the oven (hence the reason for flipping the pita onto the baking stone or baking sheet). Don't get discouraged if your pitas don't all puff. I had some non-puffers and we made little pizzas out of them and/or used them to roll around the filling instead of stuffing inside the pita. The baked and cooled pitas can be frozen or stored covered at room temperature for 1-2 days.


No comments:
Post a Comment